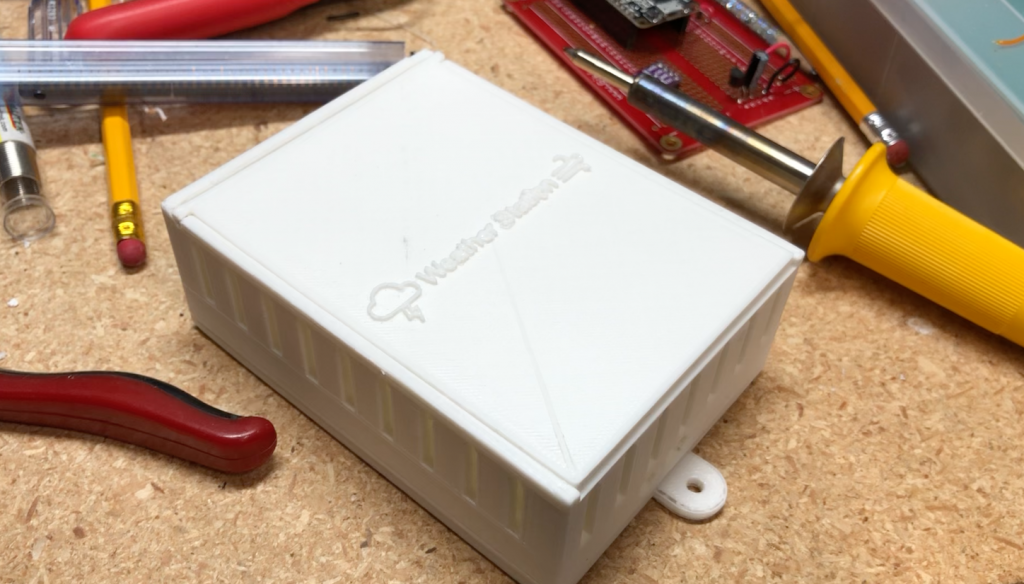
I’ve always wanted to add a backyard weather station to help record not just temperature data, but humidity, pressure, rainfall, wind speed and UV levels. My recent experiments introduced me to the ESP8266 NodeMCU, a low-cost microcontroller with embedded WiFi. I just needed to add a solar cell, a battery, a sensor and an enclosure.
Solar Power
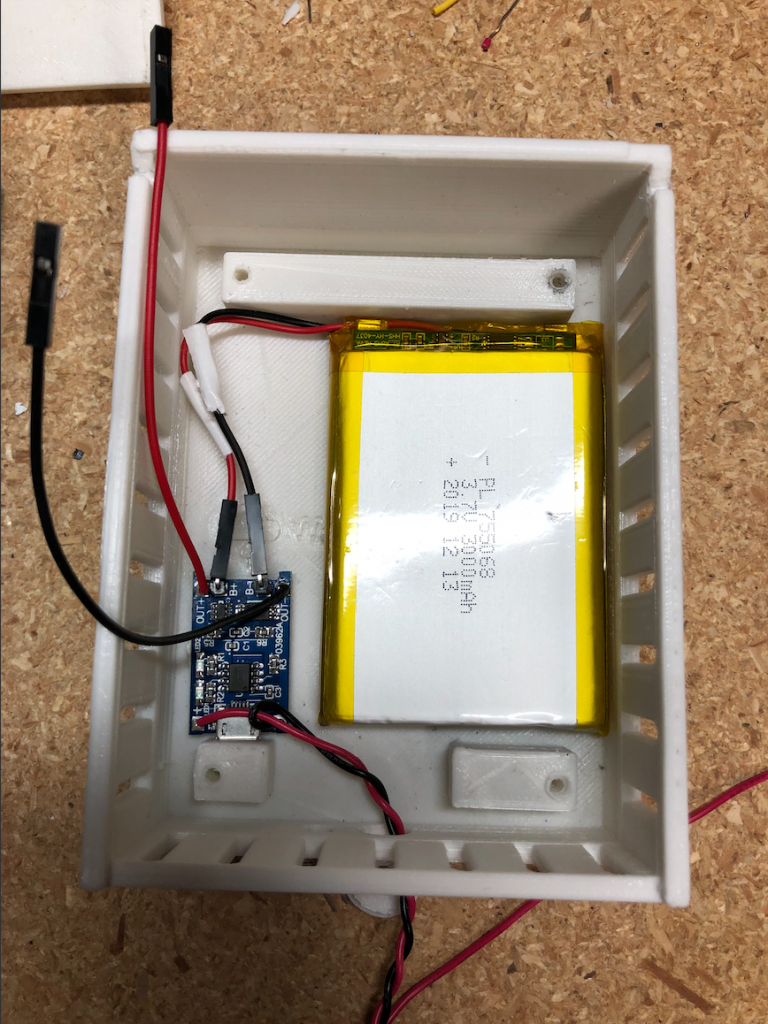
I found a 2.5W 5V/500mAh solar cell (from Amazon) and a 3.7V 3000mAh rechargeable Li-ion battery pack (Amazon). After some research (see here), I added a TP4056 charger module (Amazon) that regulates the charging and protects the battery from overcharge.
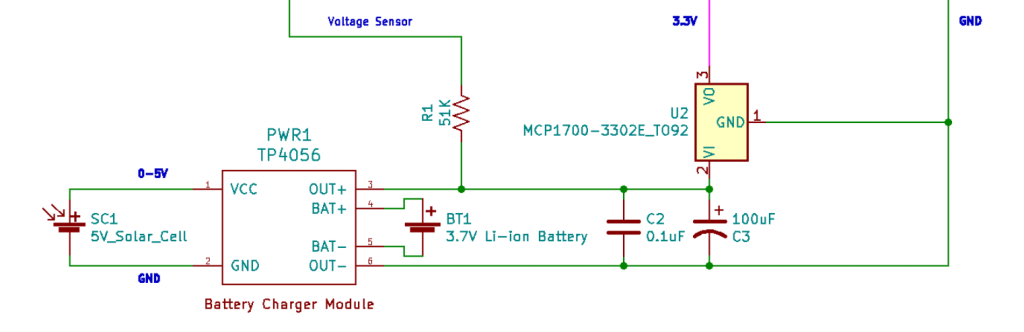
I added a 0.1uF ceramic capacitor and 100uF electrolytic capacitor to smooth the output voltage. I used a simple 3.3v voltage regulator (DigiKey) to feed the 3.3v bus for the ESP8266 and sensors.
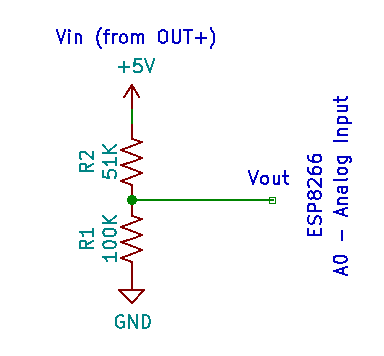
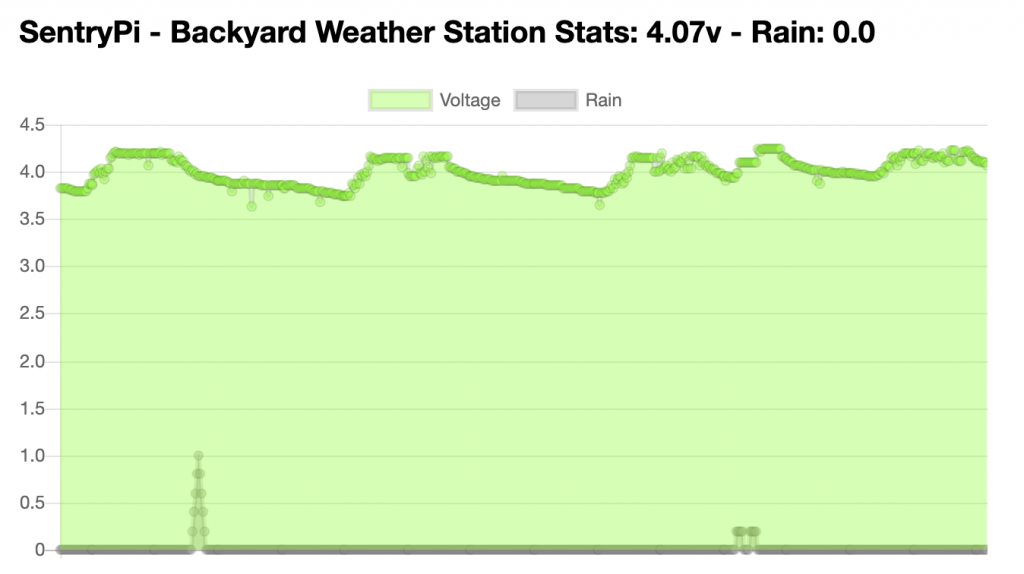
Monitoring the voltage coming from the solar cell and/or battery would help determine if the system is getting enough power during the day to keep the system running at night. The ESP8266 has an analog input (A0) that can be used to determine the output voltage but it can only handle up to 3.3v. By using a simple 2 resistor divider circuit (see right) I could monitor the voltage and apply a multiplier to get to the actual voltage I measured with a multimeter. In this case, the A0 pin was reporting 907 when the multimeter was showing 4.69v so I used 4.69 / 907.0 and further sampled other readings to ensure I had the correct value.
Circuit Design
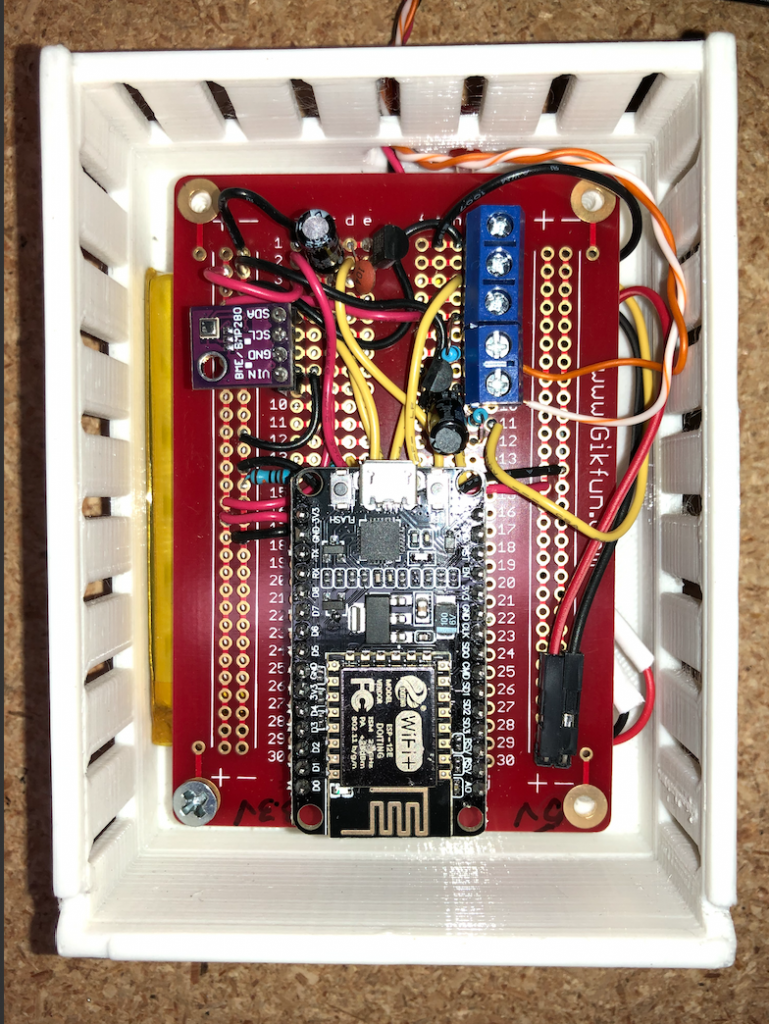
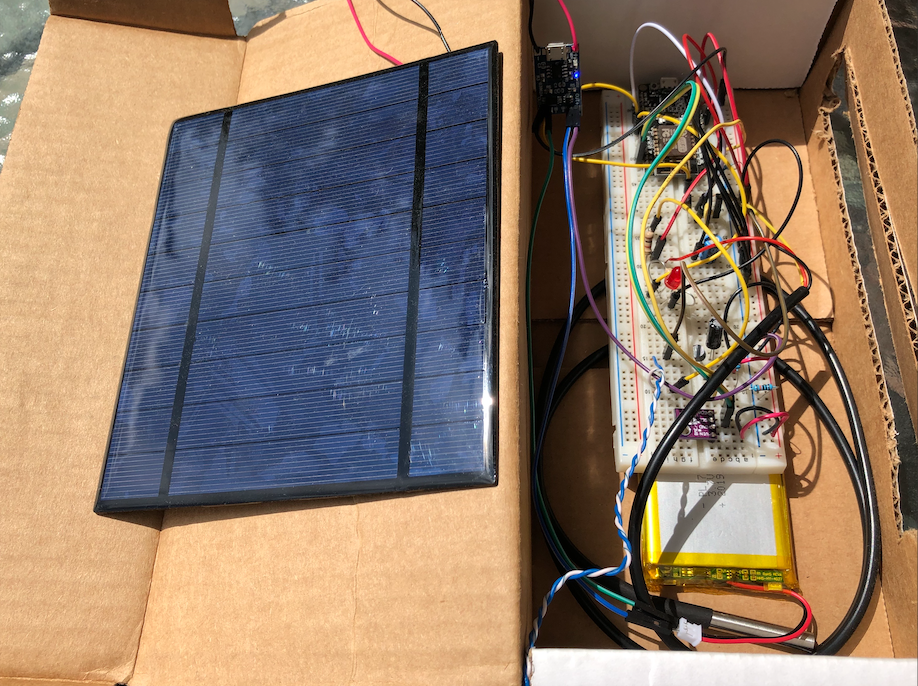
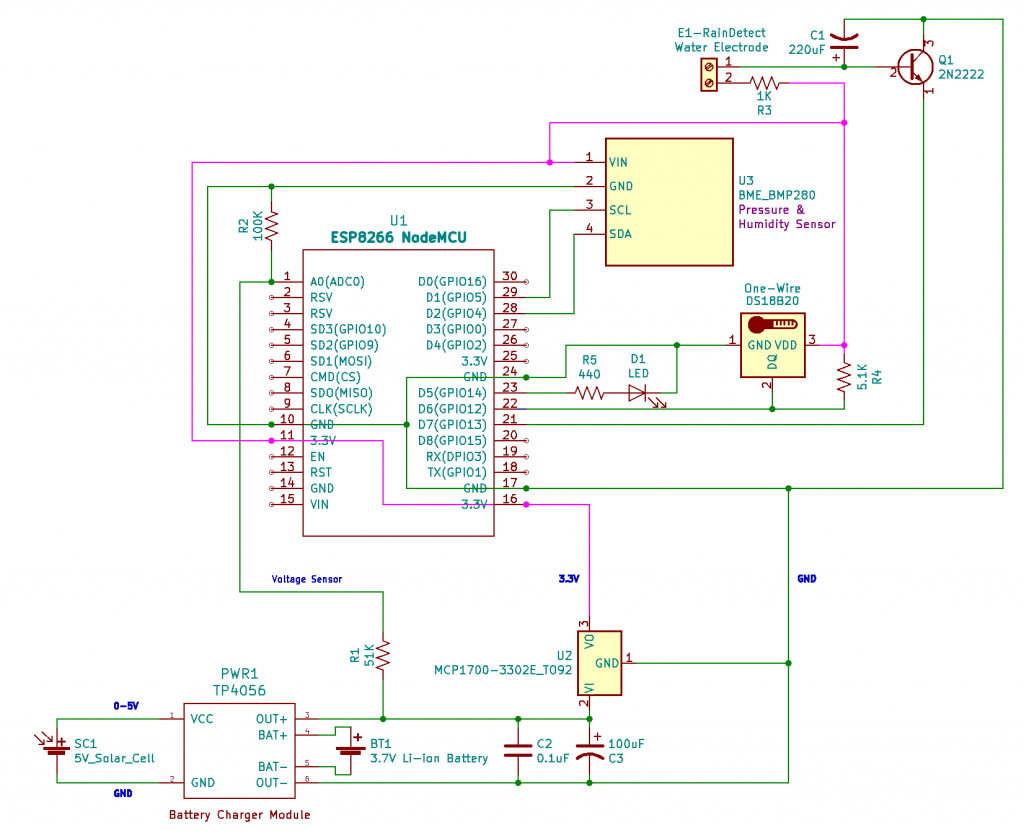
The sensors I wanted to add included a BME280 pressure and humidity sensor, a one-wire DS18B20 temperature sensor and a 2N2222 transistor powered rain detector. I put the circuit together using a simple breadboard and started on the code.
Using the free open source KiCad electronic design software, I build a schematic drawing to help build the final non-breadboarded product.
Getting Started with Arduino IDE and ESP8266
The ESP8266 NodeMCU has a USB port that allows the microcontroller to be easily powered and programmed with the Arduino IDE . However, it is not as easy to set up and use as an Arduino device. I found out that you will need to install a driver to see the device on my MacBook (see here for MacOS instructions and download the USB to UART Bridge VCP Drivers here). Once the driver is installed, the Arduino IDE needs to be set up to manage the NodeMCU. The ESP8266 I purchased came with some instructions:
Instruction & Steps of How to use:
1. Download and Install the Arduino IDE (download here)
2. Set up your Arduino IDE as: Go to File->Preferences and copy the URL below to get the ESP board manager extensions: http://arduino.esp8266.com/stable/package_esp8266com_index.json
3. Go to Tools > Board > Board Manager> Type “esp8266” and download the Community esp8266 and install.
4. Set up your chip as:
Tools -> Board -> NodeMCU 1.0 (ESP-12E Module)
Tools -> Flash Size -> 4M (3M SPIFFS)
Tools -> CPU Frequency -> 80 Mhz
Tools -> Upload Speed -> 921600
Tools -> Port -> (whatever it is)
5. In Arduino IDE, look for the old fashioned Blink program. Load, compile and upload. Go to FILE> EXAMPLES> ESP8266> BLINK
Code
Once I had the ESP8266 connected, I could start creating the code. The code is available here: https://github.com/jasonacox/WeatherStationWiFi
Rain Sensor
Using a simple NPN transistor, you can detect the presence of water. I wanted to detect rain which mean that I needed to add a couple of electrodes connected to that transistor (for detection) and our power supply. Water allows a small amount of current to pass through it to detect water, you will need to amplify it, hence the need for the transistor which turns a low current into a switch to a much larger current. The ESP8266 digital inputs can see the switched power from the transistor and can indicate water has been detected.
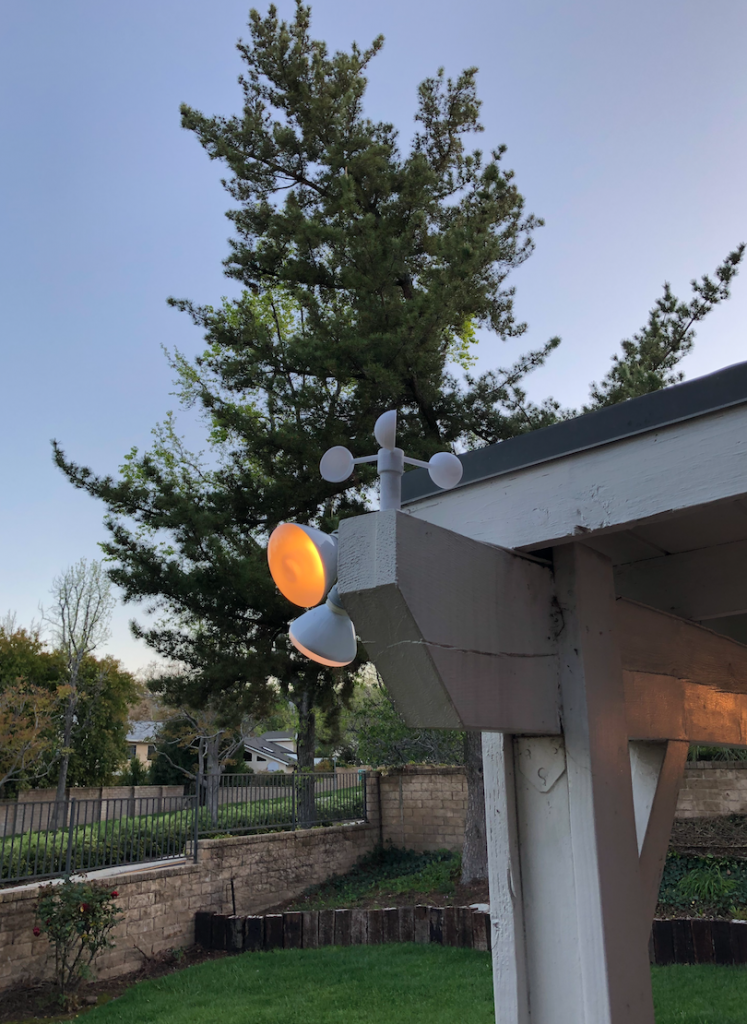
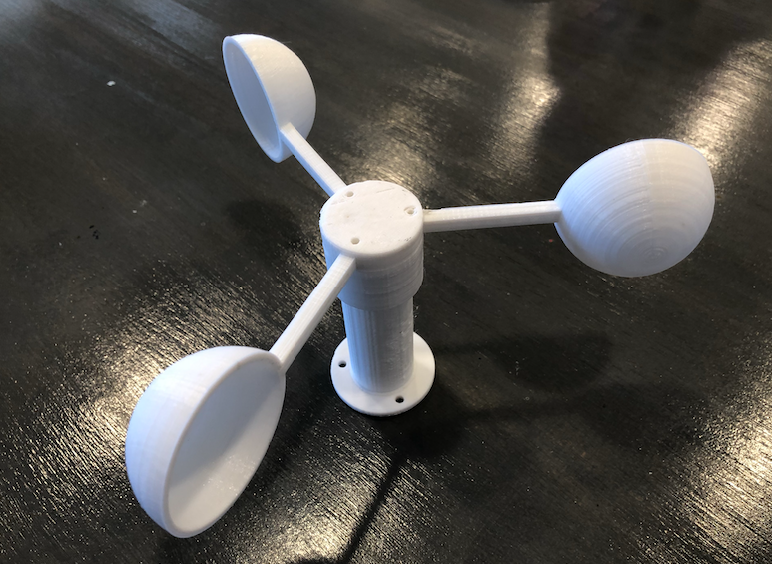
Wind Speed Sensor with an Anemometer
An anemometer is a device used to catch the wind and record its speed.
I found a 3D model on https://www.thingiverse.com/thing:2559929
More to come…
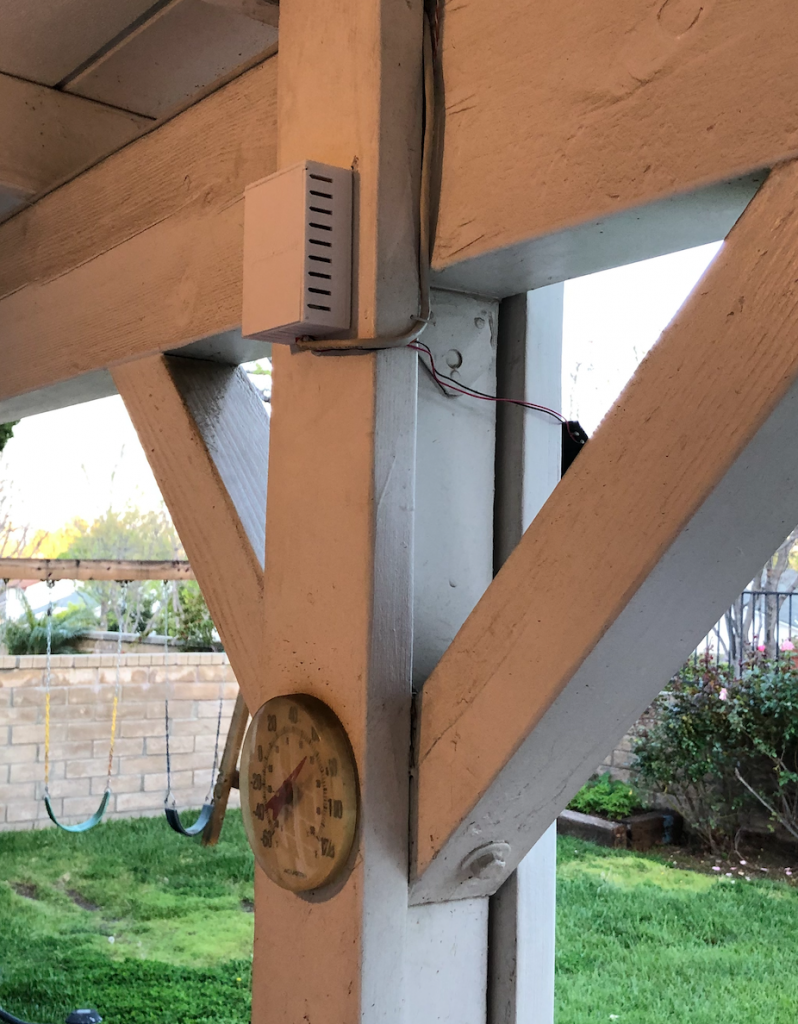
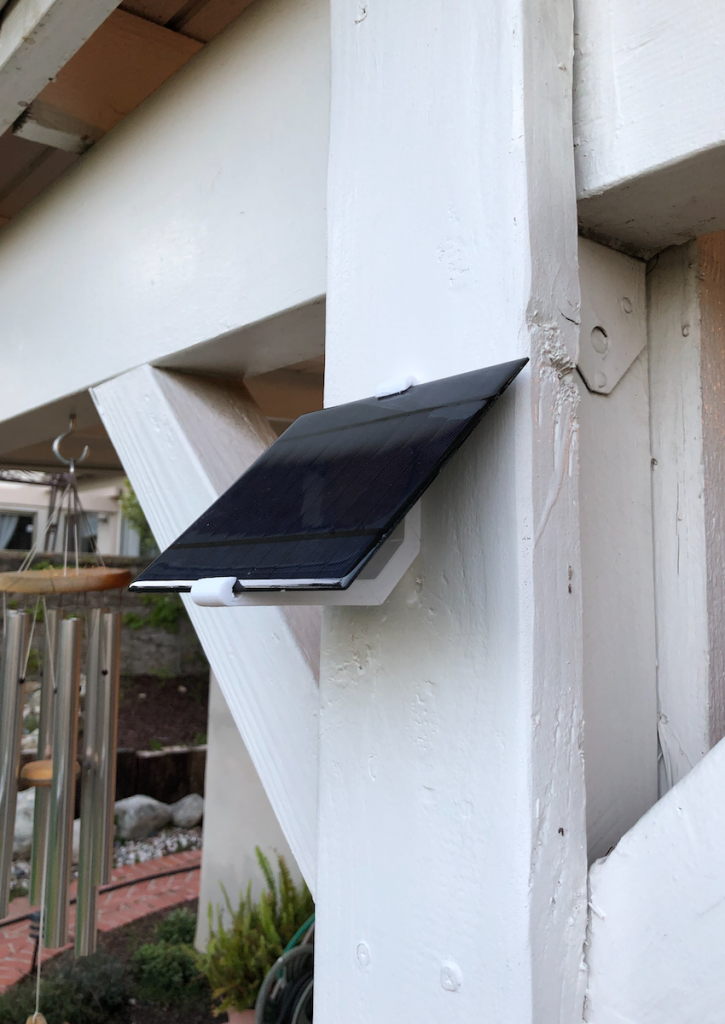
Installation